Showing posts with label Baby. Show all posts

Saturday, April 1, 2017

Baby Patchwork Quilt

Hello friends. I'm back today with another baby card. If you love embossing folders...you are gonna "need" this one! :)


I ran the Patchwork Quilt Embossing Folder through my Gemini with cardstock that is blue on one side and white on the other. Then I sanded off the raised embossed area. This classic technique has been around forever, and it never gets old! I also sanded off around the edges of the panel, which not only give it a nice finished edge, but gives the appearance of another layer. I attached the panel with dimensional foam tap on top of a couple more layers of cardstock and then to a white card base.


My idea for this card was a baby quilt that has cute little appliques in every other square. I die cut some of the Baby Accessories Dies from white cardstock, added glitter, heart rhinestones, then adhered with dimensional foam tape. I made the sentiment tag to look like one of those personalized "hand sewn by" tags. I added glossy accents on top of the die cut for added dimension.


The inside of the card is also decorated with a panel of yellow card stock that I scored around the edges and sanded off. Then I added the die cut birdie in the bottom corner. Some glitter accents and it's done. So cute!!!!


As always, thanks for stopping by. I hope this inspires you with some fun papercrafting ideas.


Supplies
Crafter's Companion - Sara's Signature Little Angel - Patchwork Quilt Embossing Folder
Crafter's Companion - Sara's Signature Little Angel - Baby Accessories Dies
Crafter's Companion - Sara's Signature Little Angel - Beautiful Baby Dies
Crafter's Companion - Sara's Signature Little Angel - 12" x 12" Paper Pad
Crafter's Companion - Sara's Signature Little Angel - Simply White Luxury Ribbon
Spectrum Noir Shimmer Pen - Clear
Gemini die-cutting and embossing machine
Collall Liquid Adhesive
Stick-It Adhesive Sheets
Score Board
White Cardstock
Dimensional Foam Adhesive
Crystal Glitter
Blue Heart Rhinestones
Glossy Accents
Zig Zag Decorative Scissors
Sanding Block

Sunday, March 26, 2017

DIY Baby Photo Frame

Hello friends! I have another project to share using the Sara Davies Signature Collection - Little Angel from Crafter's Companion. I took a plain boring photo frame and totally transformed it! Look how CUTE it turned out! (BTW...that's my youngest when she was born)


I die-cut a bunch of the Little Angel Baby Accessorie Dies using white cardstock and patterned paper from the Little Angel 12" x 12" Paper Pad. I stacked and adhered the pieces to make them thicker and dimensional, then attached to frame with foam adhesive tape.


I used a piece of the patterned paper to slip into the slot where the picture goes, then adhered the photo to that. Super duper easy! The Little Angel Collection can be used for non-baby projects as well...just don't use the baby specific items.

Make sure to follow us and stay up-to-date with all the latest happenings:

Have a great day!


Supplies:
Crafter's Companion Sara Davies Little Angel Signature Collection - Baby Accessories Dies
Crafter's Companion Sara Davies Little Angel Signature Collection - 12" x 12" Paper Pad
Crafter's Companion Gemini Machine
Collall Liquid Adhesive
Sticket It Adhesive Sheets
White Cardstock
Dimensional Foam Adhesive
Photo Frame

Saturday, March 25, 2017

Little Angel


I adore the new Little Angel Collection from Sara Davies of Crafter's Companion. Did you know this collection is now available? YUP! Check out the collection on the Crafter's Companion USA website.

Here's a project I made


I used several products from the Little Angel Collection to create my card. To start out with, I used the Dotty Clouds Embossing Folder on the front panels of the card.  Then I embossed another piece of white cardstock and cut out a few of the clouds. I covered them with white Fun Flock and then sponged light yellow ink around the bottom areas. The clouds are popped up on the card front with dimensional foam adhesive. I used a few clouds on the inside of the card too.


 I diecut some of the Baby Accessories Dies using papers from the Little Angel paper pad. They are sooo cute! On the inside of the card I adhered panels of patterned paper. The die cut circle frame with Baby sentiment is from the Beautiful Baby Die Set.


The card base was easy to create using Crafter's Companion Create-A-Card Fancy Card Blanks. I did finish the card with some crystal clear sequins. This card really is sooo cute in real life.

Check out our Pinterest Gallery that's full of great ideas using the New Little Angel Signature Collections Products.


Thanks for stopping by today.


Supplies:
Crafter's Companion Sara Davies Little Angel Signature Collection - Dotty Clouds Embossing Folder
Crafter's Companion Sara Davies Little Angel Signature Collection -  - Baby Accessories Dies
Crafter's Companion Sara Davies Little Angel Signature Collection -  - Beautiful Baby Dies
Crafter's Companion Sara Davies Little Angel Signature Collection - 12" x 12" Paper Pad
Crafter's Companion Create-A-Card Fancy Card Blanks
Crafter's Companion Gemini Machine
Collall Liquid Adhesive
Sticket It Adhesive Sheets
White Cardstock
Blue Cardstock
Dimensional Foam Adhesive
White Fun Flock
Sequins
Antique Linen Distress Ink
Ink Blending Foam

Thursday, February 18, 2016

Re-inker Magic!

I love quick and easy techniques. How about you? Yes? Well then...go check out my lastest "quick and easy" tutorial over on the Spectrum Noir Blog - Adding Texture with Blender Re-inker. Fun stuff I tell ya ;)


Isn't this card adorable! You could mass produce these for invitations, announcements and thank you cards. Or...make a few in different colors to have on hand. Twins? NO problem! Just put 2 onsies and 2 bottles on the card! Double the fun! LOL
Baby

I colored everything with my Spectrum Noir Markers -  CT2, CT4, IB1, IB2, IB3 and BT7.


The stamps and dies are from Simon Says Stamps. I absolutely adore them! The cross stitch rectangle die is from My Favorite Things. The little cross stitch design really adds to the design. I stamped the little stars with Versamark ink all over the card front. I thought it would be fun to continue on the inside of the card...


Hop on over to the Spectrum Noir Blog and check out my tutorial and technique tips.

While you are there, check out all the other great tutorials and projects. Don't forget to visit us over on our Facebook Page and Pinterest too!


Enjoy!


Supplies used on project:
Spectrum Noir Markers
Spectrum Noir Re-Inker Blender
Spectrum Noir Ultra Smooth Premium White Cardstock
Kraft Cardstock
Yellow Cardstock
Memento Tuxedo Black Dye Ink
VersaMark Ink
Simon Says Stamps Tiny Rays of Sunshine Stamp Set
Simon Says Stamps Baby Clothes & Crib Die Set
My Favorite Things Cross Stitch Rectangle Die Set
Natural Twine
Piece of old white wash clothe

Friday, September 26, 2014

Poppy's Babies

Crafter's Companion USA has released NEW Official Brambly Hedge Stamp sets! They are beyond adorable!

Here's a card I made using the new Poppy's Babies Stamp Set...


Cute...right!?!  The image is stamped on Spectrum Noir Ultra Smooth Premium White Cardstock and colored with Spectrum Noir Markers - TN1, TN3, CR3, GB9, BG1, BG3, LG1, LY2, Blender. That is layered on Kraft Cardstock. 

 In the closeup you can see where I added some Bonnie Blue Art Glitter accents for sparkle.


Go check out the inspiration gallery HERE for tons of sample projects to get your creative juices flowing.

Have a great Friday!


Wednesday, April 9, 2014

Flirty Bibs

Hello friends! I'm back again for my Paper Smooche Week 2 Guest Designer Project..

Ya know what...being selected to be a guest designer for Paper Smooches is like a dream come true! It's bucket list worthy! :) I want to thank my dear friend Kim for this opportunity.

OK...let's get to my project...shall we!

This week I'm using the NEW Flirty Frames set together with the NEW Bold Buzzwords set.


Isn't this bib card a fun idea!!! You could do these in any color scheme. The card base is 3 3/4" x 4 1/4". I trimmed the frames by hand. These new Flirty Frames would also work great as treat bag toppers! Oh yeah baby...I have a bazillion ideas going through my head for these frame stamps!

I was THRILLED when Kim released the new Bold Buzzwords set! Big bold sentiments are sooo popular! This is a must have addition to your stamping arsenal. Trust me...you NEED them!


Tip: I didn't have a blue ribbon that matched my blue paper...so I colored some seam binding with a Copic marker. MAN I love those markers!

That's it for today. See you again next week with another Paper Smooches Guest Designer Project ;)


Supplies:
Stamps - Paper Smooches Flirty Frames and Bold Buzzwords
Papers - A Muse Studio Grapefruit, Blueberry and Sugar
Inks - A Muse Studio Grapefruit and Blueberry; Hero Arts Unicorn White, Versamark
Misc. - Copic Markers; white ep; static magic; heat gun; white buttons; bakers twine; crystal glitter; Uniball white gel pen; misc. ribbons from stash

Sunday, April 28, 2013

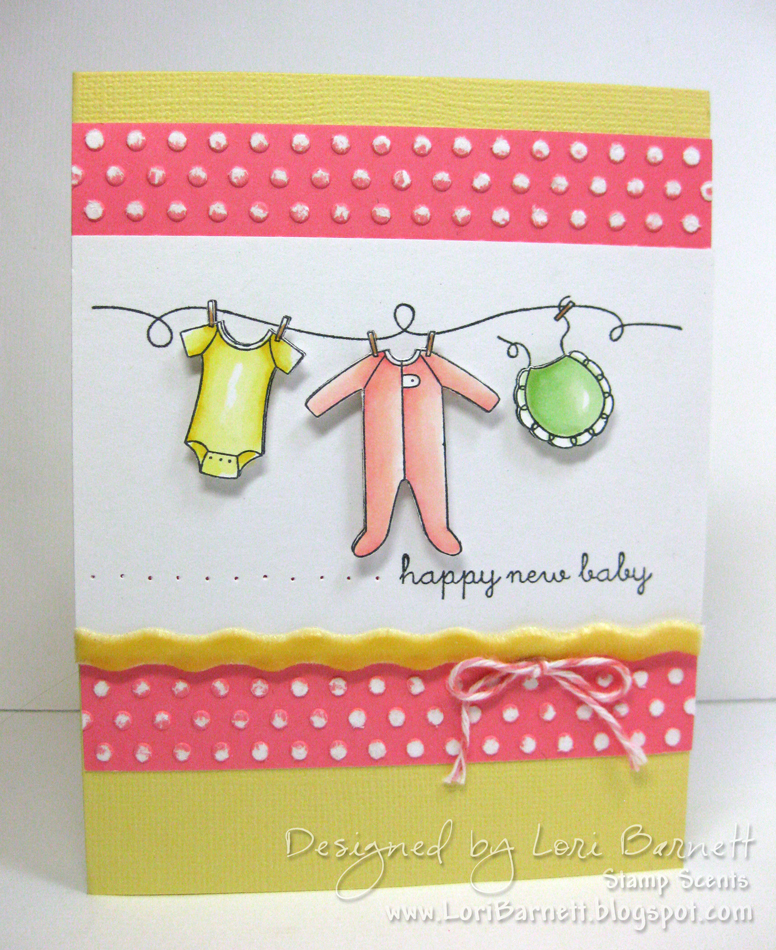
Happy New Baby x2

I just love makin' baby....CARDS!
 
I decided to make a boy and a girl version...

Stamps are from Gourmet Rubber Stamps - an Appetizers set called Clothesline Greetings by Lizzie Anne Designs.

The pink and aqua layers were embossed and then sanded off to expose the white core of the paper.  Colored with Copic markers. Velvet ribbon and tiny bow made from bakers twine.


I stamped the images again and cut 'em & popped 'em up with foam tape.  Totally makes the cards...right?! A small line of pierced holes along side of the sentiment stamped with black Versafine ink.


Simply ADORABLE!

Thanks for stopping by....and I hope you have a creative week!

Recipe Boy Card:
Dimension - 4 1/4" x 5 1/2"

Stamps
- Gourmet Rubber Stamps Clothesline Greetings
Paper - A Muse Studio Bermuda and Sugar; Bazzill Yellow
Ink - Versafine Black
Misc. - Copic Markers BG10, BG11, BG13, E23, Y11, Y13, Y15, G40, G43; Dots Embossing Folder; Sanding Block; Paper Piercer; Twine & Ribbon

Recipe Girl Card:
Dimensions - 4 1/4" x 5 1/2"
Stamps
- Gourmet Rubber Stamps Clothesline Greetings
Paper - A Muse Studio Grapefruit and Sugar; Bazzill Yellow
Ink - Versafine Black
Misc. - Copic Markers R30, R32, E23, Y11, Y13, Y15, G40, G43; Dots Embossing Folder; Sanding Block; Paper Piercer; Twine & Ribbon

Monday, November 19, 2012

Thankful for Babies

Happy House-Mouse Monday!

We have a special challenge this time around to celebrate the birth of a beautiful baby boy to one of our team members - Paula.  HOW EXCITING!!!  You can see a pic of Paula and her baby on the House-Mouse & Friends Monday Challenge Blog.  She also has a couple more pics on her blog HERE.

Our challenge is to make a project with a baby theme.  Get all the challenge and prize details on the blog HERE. 

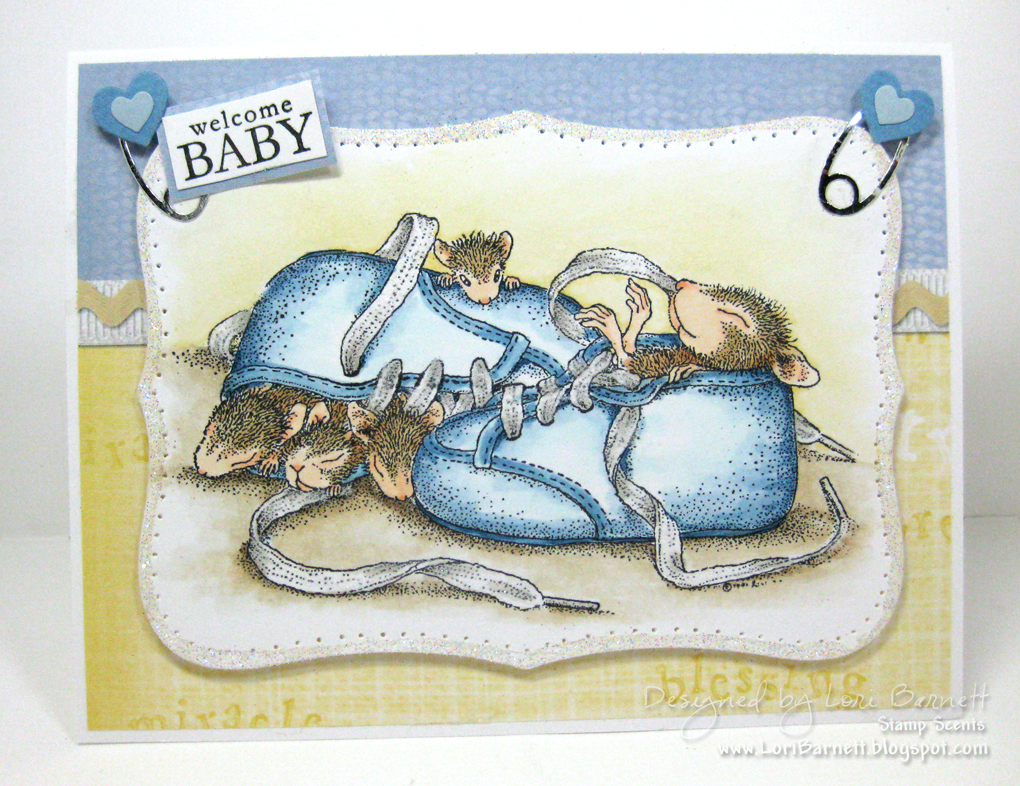
Here's my card to welcome Baby Nathan Ryan Joshua:


Isn't this image soooo cute!!!  This time I colored with Copic markers.  I added white flock to the shoe strings and glitter around the edge of the image panel.


Hope you can join us for the challenge!

Sunday, June 3, 2012

Picture Perfect Baby

Playing a couple challenges today so I could ink up my NEW Paper Smooches Pip Squeaks set. Have you seen it?
A-DOR-A-BLE!  You can check it out HERE.

First up is the Paper Smooches Picture Perfect Challenge. 


This challenge ends today...so if you wanna play along you better get busy ;) 


What a cool inspiration pic!  I was drawn to all the plates on the wall along with the basic layout of the scene.


I love how my design came together!  The circles are from the Whirligigs set.  Baby is from the Word Up set.  The little bow and baby items are from the Pip Squeak set.  I use a few more stamps from the Pip Squeak set on the inside of the card along with a sentiment from Sentiment Sampler.


I also joined in on the CAS-ual Friday Challenge.  Use anything on your Clean and Simple project to make it sparkle.  NOT like I'm a fan of glitter or anything!


In the closeup you can see I used Warm Highlights Microfine Glitter from Glitter Ritz. That stuff is almost good enough to eat!


Now...back to crafting.  Have a great week!

Recipe:
Stamps - Paper Smooches Pip Squeak, Whirligigs, Word Up and Sentiment Sampler
Paper - A Muse Studio Sugar and Kraft
Ink - Memento Angel Pink, New Sprout, Desert Sand, Toffee Crunch
Misc. - Prismacolor Pencils PC1018 PC1004 PC913, Gamsol; Quickie Glue Pen; Glitter Ritz Microfine Warm Highlights, scalloped border punch and corner rounder punch

Monday, February 27, 2012

Sugar and Spice and Everything Nice

Hey House-Mouse Fans!  Time for another House-Mouse Challenge!  Here we go.......

Challenge #114 - Sugar and Spice and Everything Nice - I'm gonna be a Grandma again VERY soon...and it's a GIRL! To celebrate...my challenge is to create a project for a precious little girl in your life.  Get all the challenge and prize details on our blog HERE.

I used one of my favorite Happy Hopper stamps - Sleepy Head.  Isn't Itty Bit sooo cute :)


I stamped the bottle on the pink flower cardstock and paper pieced it.  Coloring done with Prismacolor Pencils & Gamsol.  My layout is from Splitcoaststampers.com Sketch Challenge #373.


Did you know the Official House-Mouse Designs site has a special gallery just for YOUR gorgeous creations that feature any House-Mouse, Gruffies and Happy Hoppers images? Go check it out! AND...while you're there...submit YOUR creations!!!  Look for "HMD By Me Gallery" on the website's sidebar and follow the steps to add your work!
 
Have fun crafting!

Monday, January 2, 2012

House Mouse & Friends NEW YEAR Challenge!

Hey House-Mouse lovers!!!  We're are back from our month off over at HM & Friends Monday Challenge Blog.  Are you ready for another AWESOME year of great challenges, world class design team samples, fantastic prizes...and most of all...FUN STAMPING with your House-Mouse & Friends stamps?

Let's GIT-R-DONE!


Our first challenge for 2012 is the theme NEW.  Create a project to celebrate anything NEW to you.  Get all the challenge details, prize info. and DT samples on the blog HERE.

Mine is NEW BABY.  We have 2 NEW grand babies coming this year!  Both girls :)
 I used Martha Stewart Fringe scissors to make the layer look like a blanket. Also, you can't see it in the pic...but behind the sentiment and heart I stamped rabbit feet in a very light shade of pink.
 Isn't this Happy Hopper so sweet!  The bottle is paper pieced.  All coloring done with pencils & gamsol.

Have fun creating! 

Recipe:
Stamps - House-Mouse Designs Baby Itty Bit; Rabbit Feet; A Muse Studio Sleepy Sighs
Paper - A Muse Studio Kraft, Sugar & Onyx; Pebbles Inc. My Baby Girl Dot DP
Ink - VersaFine Onyx Black; Ranger Distress inks
Misc. - Prismacolor Pencils & Gamsol; Martha Stewart Fringe Scissors; A Muse Studio Heart Trio Die Set; Big Shot; A Muse Studio Twine & Button; gingham ribbon from stash; Black Micron Pen; 3D Foam Tape