I LOVE making treat containers! I also love figuring out how to get the most bang out of my buck when using specialty papers. Well... today I'm sharing a little of BOTH. I've designed the most adorable Witch Hat Treat Box using 1 sheet of Crafter's Companion 6" x 6" Shimmering Black Pearl Cardstock to make TWO boxes! I've also used 2 of the NEW Halloween Stamp Sets from Crafter's Companion - which will be available TOMORROW - Thursday Sept 4th!!! Sooo much fun stuff going on around here I can hardly container myself! LOL

First...let me tell you a little about the Shimmering Cardstock. This specialty cardstock is the BEST! It scores absolutely wonderful and makes the best boxes imaginable! It's so sturdy you can pile the treat containers all in a big bucket or bowl and not worry about 'em getting all bent up or crushed! So check this out... One package of 20 sheets is $6.95. You can make 80 high quality treat containers from 1 package!!! That's right....EIGHTY! Awesome huh!?!
Supplies:
- Crafter's Companion 6" x 6" Black Pearl Shimmering Cardstock
- Scoring tool - I'm using The Ultimate Crafter's Companion
- Crafter's Companion Happy Haunting Stamp Set
- Crafter's Companion Best Witches Stamp Set
- Radiant Neon Electric Purple Ink Pad
- Versamark Ink Pad
- Double-Sided Adhesive Tape
- Orange and White Cardstock Scraps
- White Embossing Powder
- Anti-Static Pouch
- Heat Embossing Gun
- Purple Microfine Glitter
- Misc Ribbon, Bakers Twine, etc.
- Button
- Hole Punch
Box Instructions:
Cut 2 - 2 1/2" strips from the 6" x 6" sheet of Black Pear Shimmer cardstock. You'll be left with a 1" x 6" strip - which will be used for the hat brims. The 2 1/2" strips are for the boxes.

Score the 2 1/2" strips in half -- at 3". I used my Ultimate Crafter's Companion board and scored at the "Gatefold 12x12" line -- with the short end of the strip butt up against the top sidebar.

Next, we need to make a "marker notch" at the center (1 1/4") of each end. To do this on my Ultimate board, I simply place my paper between the Gatefold 12x12 line and Half-Fold US Letter line, and make the notches using the Half-Fold 1/2 US Letter line.


Now we need to score from the "notch" to the "half fold score line". Simply position the cardstock diagonally on any groove line -- from the "notch" to the "half fold score line" -- and score to join the lines. See sample picture.

Do the same thing on the other 3 corners of the strip.

Here's what it will look like once all the scoring is done:

Prep the cardstock with anti-static powder. This is important to keep stray bits of white embossing powder from sticking where you don't want it. Stamp the spider image with Versamark ink and heat emboss with white embossing powder. When cooled, brush away the anti-static powder.

Fold the cardstock in half at the score line - then punch holes as shown in picture.

Fold in the sides at the score lines to form the wedge box. Check your punched holes to make sure they are lined up enough to string ribbon through. The holes don't need to be perfectly lined up. If needed...you can re-punch any of the individual holes to adjust. TIP: If you end up having to re-punch hole(s) - just have those flaps folded to the inside so they don't show.

NOTE: This box is not assembled using any adhesive tape or glue. Once you place the goodies inside the box, fold the edges over, thread the ribbon through the holes and tie. That will keep the box closed. If you tape the sides shut - the box will have to be torn open to get inside.

Next comes the hat brim. Apply a strip of double-sided adhesive tape on the long edge of the 1" Shimmer Black Pearl cardstock strip.

Peel off the tapes protective backing and cover the tape with purple glitter. TIP: Burnish (rub) the glitter with your finger to make sure it sticks really well and covers all the sticky tape.
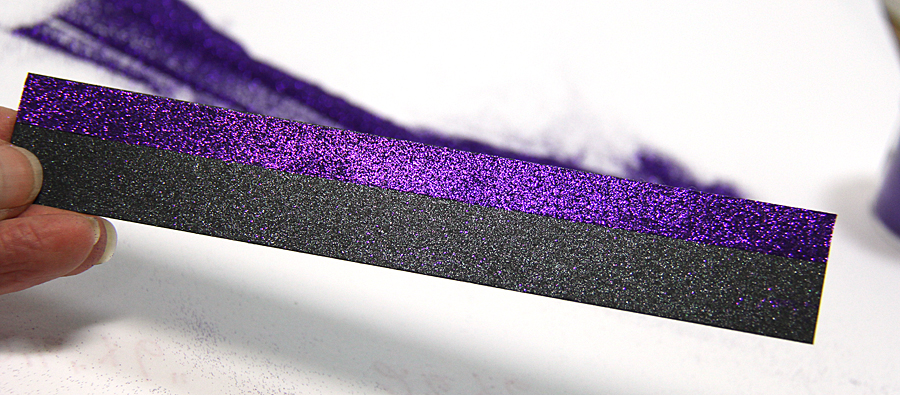
Cut the strip in half. Now you'll have two strips that measure 1" x 3" each.

Trim the ends diagonally. Embellish as desired. I added a thin strip of orange cardstock, orange rhinestones and a green button threaded with black & white bakers twine. Adhere to treat box with double-sided adhesive tape or glue.

To create the sentiment tags, stamp the sentiment on white cardstock with Radiant Neon Purple Ink. Trimmed each word and adhered to orange tags. The orange tags I cut out by hand and punched holes. Tie tags to the treat box.

That's it! I hope I've inspired you to go have some fun with your stamps and cardstock. Don't forget to check out all the NEW Crafter's Companions Halloween products on the website TOMORROW!!!! YAY!

Have a funtastic day!

No comments:
Post a Comment